Sand casting is a versatile and ancient method of metalworking that allows for the creation of intricate designs with relatively simple tools and materials. This guide will walk you through the process of sand casting, from preparing your materials to finishing your final piece. Whether you're a beginner or an experienced artisan, this technique offers endless possibilities for creativity and expression.
Materials and Tools: Before diving into the process, gather the following materials and tools:
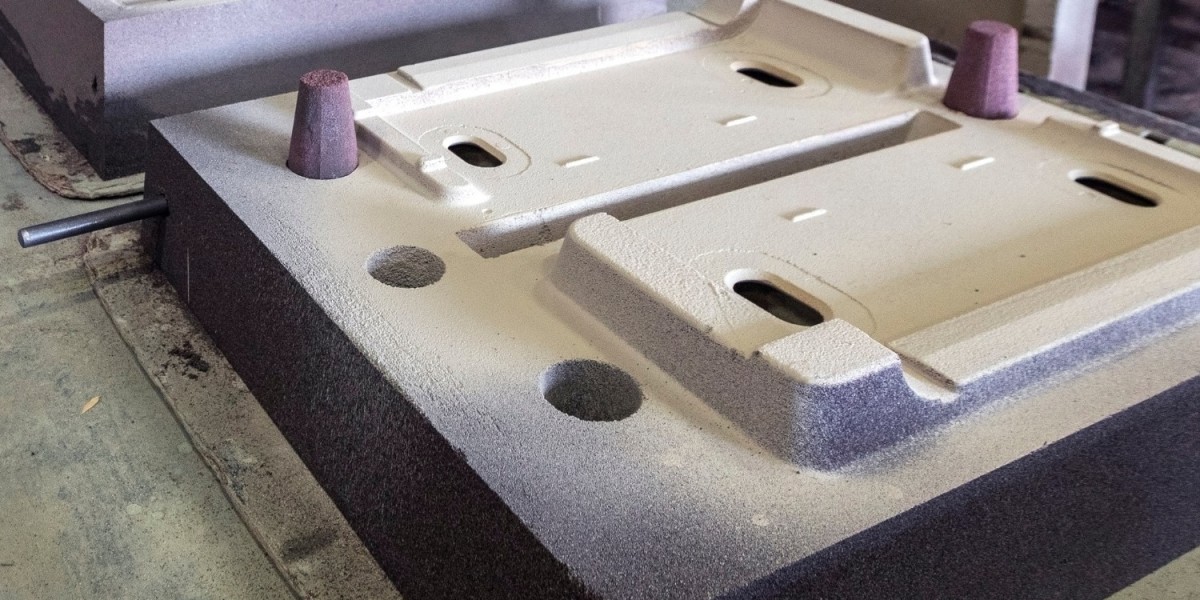
- Foundry sand: Fine-grain silica sand is commonly used for sand casting due to its ability to hold intricate details.
- Binder: A substance like clay or oil is necessary to bind the sand together and create molds.
- Pattern: The object you want to cast, typically made of wood, metal, or 3D printed plastic.
- Mold frame: Construct a frame to contain the sand and pattern.
- Crucible: A container for melting metal, usually made of ceramic or graphite.
- Furnace or foundry: A heat source capable of melting your chosen metal.
- Safety equipment: Gloves, apron, goggles, and a respirator to protect against fumes and hot metal.
Process:
Pattern Preparation:
- Choose or create a pattern for your casting. Ensure it has draft angles to allow for easy removal from the sand mold.
- Coat the pattern with a parting compound to prevent it from sticking to the sand.
Mold Construction:
- Place your pattern in the center of the mold frame.
- Fill the frame halfway with sand and pack it tightly around the pattern.
- Add more sand and continue packing until the frame is full.
- Use a ramming tool to compact the sand and ensure a firm mold.
- Create sprues and vents by cutting channels in the sand to allow for the flow of molten metal and the release of gases.
Mold Assembly:
- Carefully remove the pattern from the sand mold, leaving a negative impression of the desired object.
- Inspect the mold for any defects or imperfections and repair as needed.
- Assemble the cope (top half) and drag (bottom half) of the mold, ensuring proper alignment and registration pins.
Metal Melting:
- Place your crucible in the furnace and add the desired metal.
- Heat the furnace to the melting point of the metal, typically between 1,500°F to 2,000°F depending on the alloy.
- Use a lifting tool to carefully pour the molten metal into the mold through the sprue.
Cooling and Removal:
- Allow the metal to cool and solidify within the mold.
- Once cooled, carefully disassemble the mold to reveal the casting.
- Remove any excess sand and clean the casting with a wire brush or sandblasting.
Finishing:
- Remove any remaining sprues and vents from the casting.
- Use files, sandpaper, or grinding tools to smooth any rough edges or imperfections.
- Optionally, apply a patina or surface treatment to enhance the appearance of the casting.
Conclusion: Sand casting is a rewarding craft that allows for the creation of unique and personalized metal objects. With the right materials, tools, and techniques, you can unleash your creativity and bring your designs to life. Experiment with different patterns, metals, and finishes to create truly one-of-a-kind pieces through the timeless art of sand casting.