
In the world of e-commerce and online marketing, product photography plays a critical role in attracting potential customers. High-quality images can make or break a sale, and one of the essential skills to master is product photo retouch. In this blog, we’ll explore the best practices for retouching product photos like a pro, ensuring your images stand out and convert viewers into buyers.
Understanding the Importance of Product Photo Retouching
Retouching product photos is not just about making the products look good; it’s about presenting them in the best possible light. Well-retouched photos can highlight the product's features, emphasize its quality, and align with the brand’s aesthetic. In the competitive online market, where customers can’t physically touch or see the products, images must do all the talking.
Impact on E-Commerce Success
Studies have shown that high-quality product images can significantly increase conversion rates. Whether you’re selling on your website or through platforms like Amazon or eBay, polished and professional-looking photos are more likely to attract clicks and purchases. Retouching helps eliminate distractions, correct imperfections, and create a consistent visual style that resonates with your audience.
Preparing Your Images for Retouching
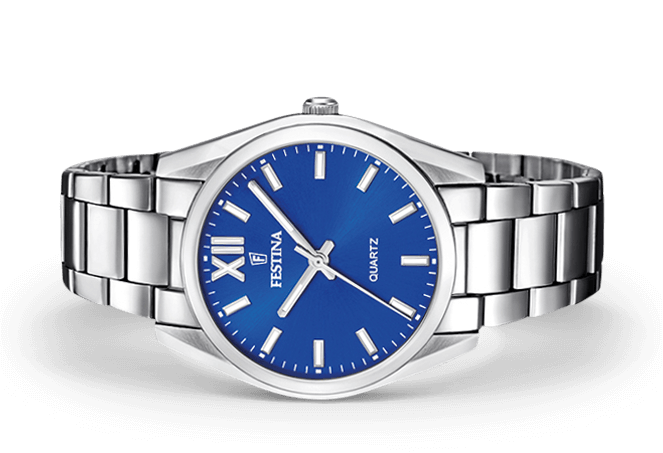
The foundation of excellent retouching starts with high-quality, well-lit photos. Ensure that your images are shot in high resolution, with proper lighting and focus. The better the quality of the raw images, the easier and more effective the jewelry photo retouching process will be. Using a good camera and lens, along with a tripod for stability, can make a huge difference.
Organizing Your Workflow
Before diving into retouching, it’s essential to organize your workflow. This includes backing up your raw files, creating duplicates for editing, and setting up a consistent file-naming convention. Organizing your files ensures that you can easily track changes and revert to previous versions if necessary. A well-structured workflow saves time and helps maintain consistency across your product images.
Essential Tools for Professional Retouching
Photoshop is the industry standard for retouching product photos, offering a wide range of tools for precision editing. However, alternatives like Lightroom and Capture One are also popular for their batch processing capabilities and non-destructive editing features. Selecting the right software depends on your specific needs and preferences, but investing time in learning your chosen tool will significantly enhance your retouching results.
Utilizing Key Retouching Tools
Some of the most essential tools in Photoshop for product photo editing include the Clone Stamp Tool, Healing Brush Tool, and Dodge and Burn. The Clone Stamp and Healing Brush are perfect for removing blemishes, dust, and scratches, while Dodge and Burn can help enhance highlights and shadows to add depth and dimension to your images. Mastering these tools is crucial for achieving professional-quality retouching.

Enhancing Product Details and Textures
One of the critical aspects of product retouching is ensuring that details are sharp and clear. Sharpening helps enhance the textures and details of the product, making it more visually appealing. However, it’s important to strike a balance; over-sharpening can lead to an unnatural appearance. Using techniques like Unsharp Mask or High Pass Filter in moderation can achieve the desired effect.
Highlighting and Adjusting Textures
Textures can make or break a product photo, especially when it comes to items like clothing, jewelry, or gadgets. Use retouching techniques to highlight the product’s textures, ensuring they look true to life. This might involve adjusting contrast, selectively applying sharpening, or enhancing specific areas of the image to bring out the product’s unique features.
Color Correction and Consistency
Color accuracy is vital in product photography since customers rely on images to gauge the color of the product they’re purchasing. Use color correction tools like Curves, Levels, and Hue/Saturation in Photoshop to ensure that the colors in your photos match the actual product. It’s also essential to calibrate your monitor regularly to maintain color accuracy across your workflow.
Maintaining Color Consistency
Consistency is key, especially if you’re photographing a range of products. Ensure that all product images have a consistent color tone and brightness, which can be achieved by applying the same color correction settings across your images. Batch processing in software like Lightroom can help maintain consistency, saving time while ensuring a uniform look across your product catalog.
Removing Distractions and Imperfections
A clean, distraction-free background ensures that the focus remains on the product. Use tools like the Pen Tool or Quick Selection Tool in Photoshop to isolate the product and remove any unwanted elements from the background. You can also use the Clone Stamp or Healing Brush Tool to remove any dust spots, scratches, or other imperfections that might distract from the product.
Perfecting Edges and Shadows
Clean and well-defined edges are crucial for a professional look. Pay close attention to the product’s edges during retouching, ensuring they are smooth and free from jagged lines. Additionally, adding or refining shadows can help ground the product in the image, making it appear more realistic. Techniques like drop shadows or natural shadow creation can enhance the product’s presentation.
Final Touches and Quality Control
Once the major retouching tasks are completed, it’s time to add the finishing touches. This might include fine-tuning the contrast, adjusting the exposure, or adding a vignette to draw attention to the product. These subtle adjustments can make a significant difference in the overall look and feel of the image, giving it a polished, professional appearance.
Quality Control and Review
Before finalizing the image, conduct a thorough quality control check. Zoom in to 100% to inspect the image for any remaining imperfections, color inconsistencies, or artifacts. Comparing the edited image with the original can help you ensure that the retouching has enhanced the product without losing any essential details. A second pair of eyes, like a colleague or a professional reviewer, can also provide valuable feedback.
Preparing Images for Different Platforms
When preparing images for the web, it’s essential to optimize them for faster loading times without compromising quality. This involves resizing the images to the appropriate dimensions and compressing them to reduce file size. Tools like Photoshop’s “Save for Web” feature or online compressors can help achieve the right balance between quality and file size.
Adapting to Different Platforms
Different platforms may have specific requirements for product images. For instance, Amazon has guidelines regarding image dimensions, background colors, and file formats. Ensure that your retouched images meet the standards of each platform you’re using, whether it’s your website, social media, or e-commerce marketplaces. Consistently adapting your images to meet these requirements can improve visibility and sales.
Conclusion: Mastering Product Photo Retouching
Retouching product photos like a pro requires a combination of technical skills, creative vision, and attention to detail. By following these best practices, you can elevate your product images, making them more appealing and effective in driving sales. Whether you’re working with a small online store or a large e-commerce platform, investing in high-quality retouching can significantly impact your success in the competitive world of online retail.